How to Apply, Remove and care for your nails
How to Apply Press-On Nails
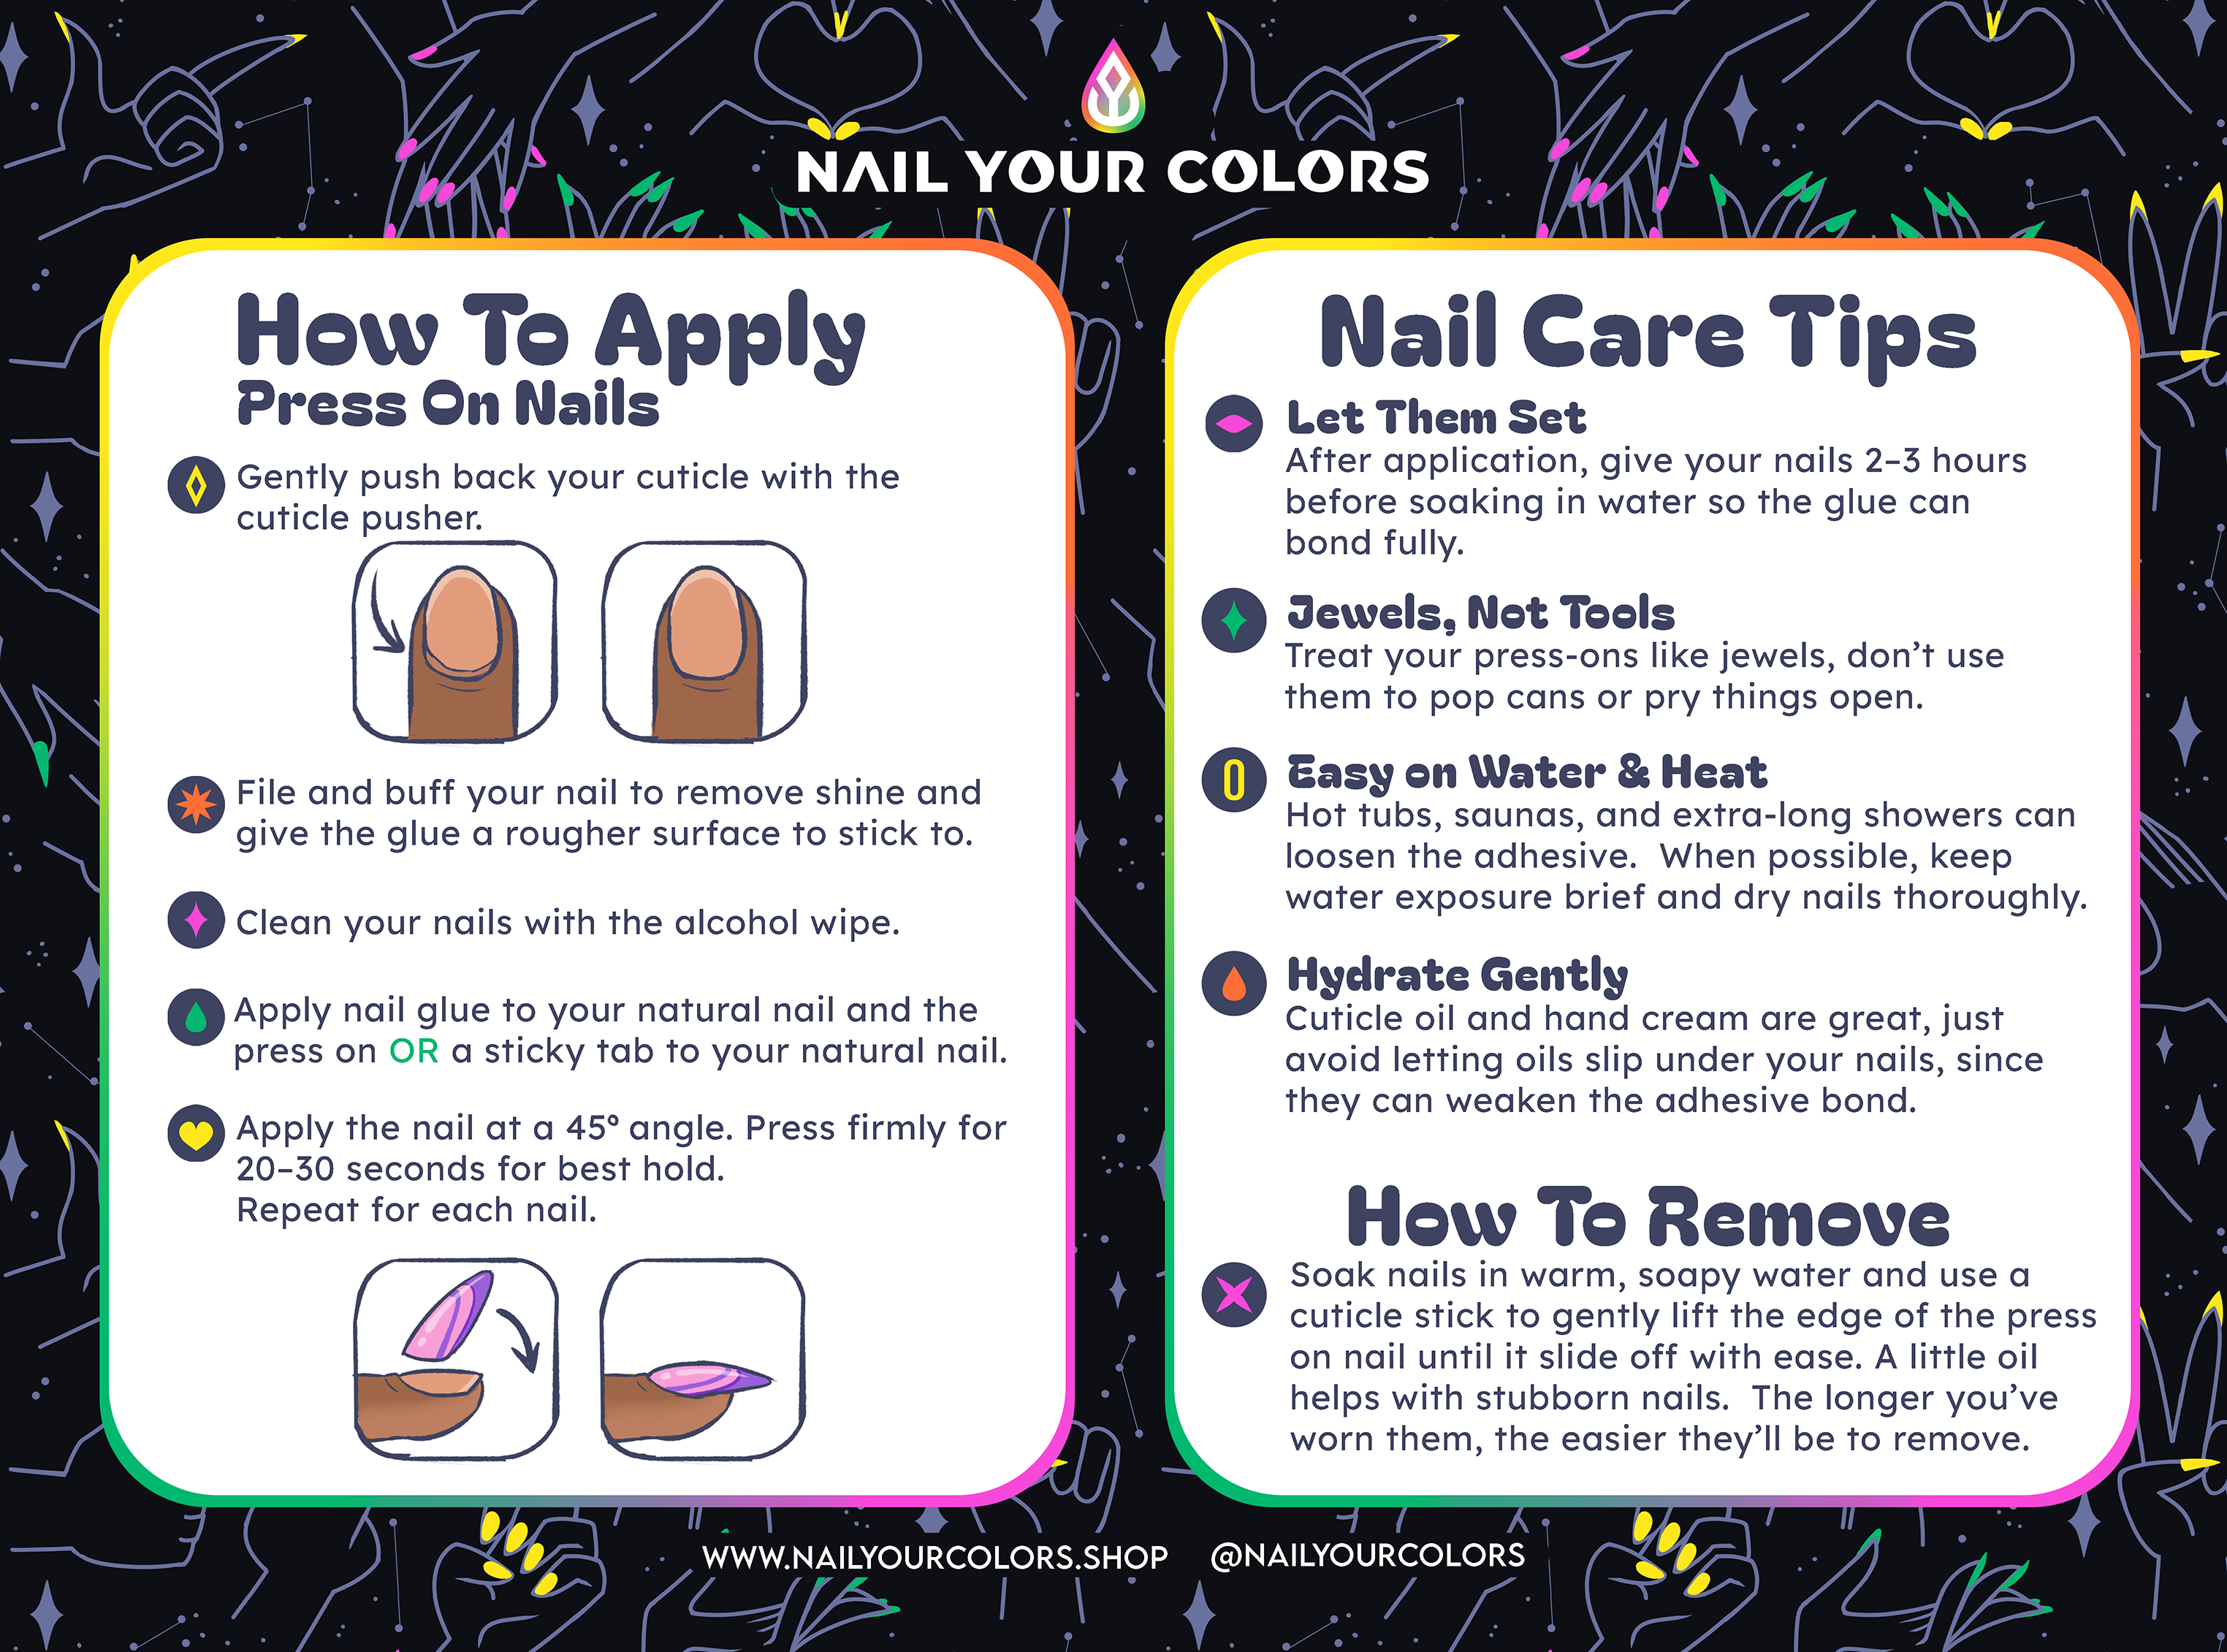
Follow these steps to get a long-lasting, salon-quality finish with your Nail Your Colors press-on nails.
- Prep your nails
Gently push back your cuticles using the included cuticle stick. This creates a smooth surface and helps your press-ons sit flush for a more natural look. - File and buff
Use the nail file and buffer to remove any shine and lightly roughen the nail surface. This helps the glue adhere more securely and extends wear time. - Clean thoroughly
Wipe your nails with the included alcohol pad to remove oils and residue. Clean nails ensure the adhesive bonds properly. - Choose your adhesive
For long wear (2–3 weeks), apply a thin layer of nail glue to both your natural nail and the press-on. For short wear (1–2 days), use the sticky nail tabs included in your kit. - Apply at an angle
Place each press-on at a 45° angle starting near your cuticle, then gently press down and hold for 20–30 seconds to secure. Repeat for each nail.
**Pro tip: Avoid contact with water for at least 2–3 hours after application to allow the adhesive to set fully.
How to Remove Press-On Nails
Removing your nails correctly keeps both your natural nails and your press-ons in great shape for reuse.
- Soak your nails
Fill a small bowl with warm, soapy water and soak your hands for 10–15 minutes. This helps soften the adhesive. - Loosen the edges
Using the included cuticle stick, gently lift around the edges of each press-on. Never force or rip the nails off. If they resist, soak them a few minutes longer. - Add oil if needed
For stubborn nails, apply a few drops of cuticle oil or olive oil around the edges. This helps dissolve the glue safely and adds moisture back to your nails. - Clean and store
Once removed, gently wipe pr file away any leftover glue from the underside of your press-ons and store them for next time.
**Pro tip: The longer you’ve worn your nails, the easier they’ll be to remove.